Monday, 18 April 2016
Tuesday, 1 December 2015
Problems with Cortex-M0 SysTick_Handler interrupt function ? Did you extern "C" it ?
SysTick is a system ticker on the ARM Cortex-M3 and -M0.
It is an extremely handy timer that counts down from a set 24-bit value. When it reaches 0, an interrupt can be set to do something, for example increment a counter.
In my case, I wanted a counter that would count roughly 1 millisecond at a time.
To set up the counter (on the LPC11U68), I do the following:
Here is the interrupt handler function:
I was like what ?!!?? I could see by hardware debugging that SysTick->VAL was decreasing, so SysTick was running.
The reason was very simple. SysTick_Handler is declared in startup_LPC11U68.cpp as follows:
Now, in a .cpp file, the name of your SysTick_Handler WILL BE MANGLED !
Therefore you MUST use extern "C" if your handler is within a .cpp file !
Like so:
It is an extremely handy timer that counts down from a set 24-bit value. When it reaches 0, an interrupt can be set to do something, for example increment a counter.
In my case, I wanted a counter that would count roughly 1 millisecond at a time.
To set up the counter (on the LPC11U68), I do the following:
void init_timer(void) {SysTick->LOAD is the value that Systick counts down from. So for a clock speed of 48 MHz, a countdown from 48000 will give you 1000 interrupts per second. The -1 is needed, but I can't remember what was the reason for it.
// to get 1000 interrupts per second the reload value should be 48000
SysTick->LOAD = 48000-1;
SysTick->VAL = 0;
SysTick->CTRL = 4 | 2 | 1; //CLKSOURCE=CPU clock | TICKINT | ENABLE
pt_count = 0;
}
Here is the interrupt handler function:
void SysTick_Handler(void) {However, the interrupt was not firing, and the counter was not growing !
//interrupt happens when systick has counted down to zero
pt_count++; // increment counter
}
I was like what ?!!?? I could see by hardware debugging that SysTick->VAL was decreasing, so SysTick was running.
The reason was very simple. SysTick_Handler is declared in startup_LPC11U68.cpp as follows:
WEAK void SysTick_Handler(void);In addition, there is a implementation of an empty SysTick_Handler in the same file:
AFTER_VECTORS void SysTick_Handler (void) {}IN ORDER FOR YOUR OWN SysTick_Handler TO REPLACE THIS EMPTY FUNCTION THE NAME MUST BE EXACTLY THE SAME
Now, in a .cpp file, the name of your SysTick_Handler WILL BE MANGLED !
Therefore you MUST use extern "C" if your handler is within a .cpp file !
Like so:
extern "C" {
void SysTick_Handler(void) {
//interrupt happens when systick has counted down to zero
pt_count++; // increment counter
}
}
Tuesday, 6 October 2015
Importing mbed libraries to Em::Blocks - do not get caught by RTTI and "undefined reference to typeinfo" !
Ok, so you got some project that you have taken from mbed online compiler and imported to Em::Blocks. It's compiling fine.
And then you decide, oh yeah I need another library from mbed, so I'll just download it and add the files into my project in Em::Blocks.
Easy, right ? WRONG !!!
If you have any virtual functions i.e. polymorphic C++ classes, you will run into this:
Namely, you will run into "undefined reference to typeinfo' error given by the linker.
And you will be scratching your head.
And you will be reading up on your knowledge of polymorhism. Speaking of which, this is the most through and informative description I have ever seen: http://www.drbio.cornell.edu/pl47/programming/TICPP-2nd-ed-Vol-one-html/Chapter15.html
Ok back to the story.
And you will be wondering what on earth is going wrong. Some inherited classes with virtual functions work, while others do not. What on earth could it be ? Malformed destructors ? Missing definitions ? Missing RTTI ?
... can't be RTTI. RTTI was deprecated in mbed a long time ago.
... can't be RTTI. I am already building mbed libs from source, not the ready-built binaries.
So it can't be RTTI, right ? WRONG BUDDY, IT IS THE *¤%# RTTI.
(Sorry for outburst, took me a _while_ to find this problem)
Why ? Because imported files get different settings than files that were within the original .eix exported from mbed.
And then you decide, oh yeah I need another library from mbed, so I'll just download it and add the files into my project in Em::Blocks.
Easy, right ? WRONG !!!
If you have any virtual functions i.e. polymorphic C++ classes, you will run into this:
.objs\~#\adafruit-gfx-library\adafruit_gfx.o:(.rodata._ZTI12Adafruit_GFX+0x8)||undefined reference to `typeinfo for mbed::Stream'|
Namely, you will run into "undefined reference to typeinfo' error given by the linker.
And you will be scratching your head.
And you will be reading up on your knowledge of polymorhism. Speaking of which, this is the most through and informative description I have ever seen: http://www.drbio.cornell.edu/pl47/programming/TICPP-2nd-ed-Vol-one-html/Chapter15.html
Ok back to the story.
And you will be wondering what on earth is going wrong. Some inherited classes with virtual functions work, while others do not. What on earth could it be ? Malformed destructors ? Missing definitions ? Missing RTTI ?
... can't be RTTI. RTTI was deprecated in mbed a long time ago.
... can't be RTTI. I am already building mbed libs from source, not the ready-built binaries.
So it can't be RTTI, right ? WRONG BUDDY, IT IS THE *¤%# RTTI.
(Sorry for outburst, took me a _while_ to find this problem)
Why ? Because imported files get different settings than files that were within the original .eix exported from mbed.
When importing an .EIX file every c++ file is given it’s own properties section in the .ebp file, where as the regular c-files relies on global options. If I add a c++ file after the import, this file doesn’t get its own section of options. It has to rely on the global options, which are for gnu99 c and not gnu++98.Long story short. Turn RTTI generation off (-fno-rtti) in global settings, and your project will compile.
Labels:
C++,
EmBlocks,
EmIDE,
mbed,
polymorphism,
RTTI,
virtual functions
Monday, 28 September 2015
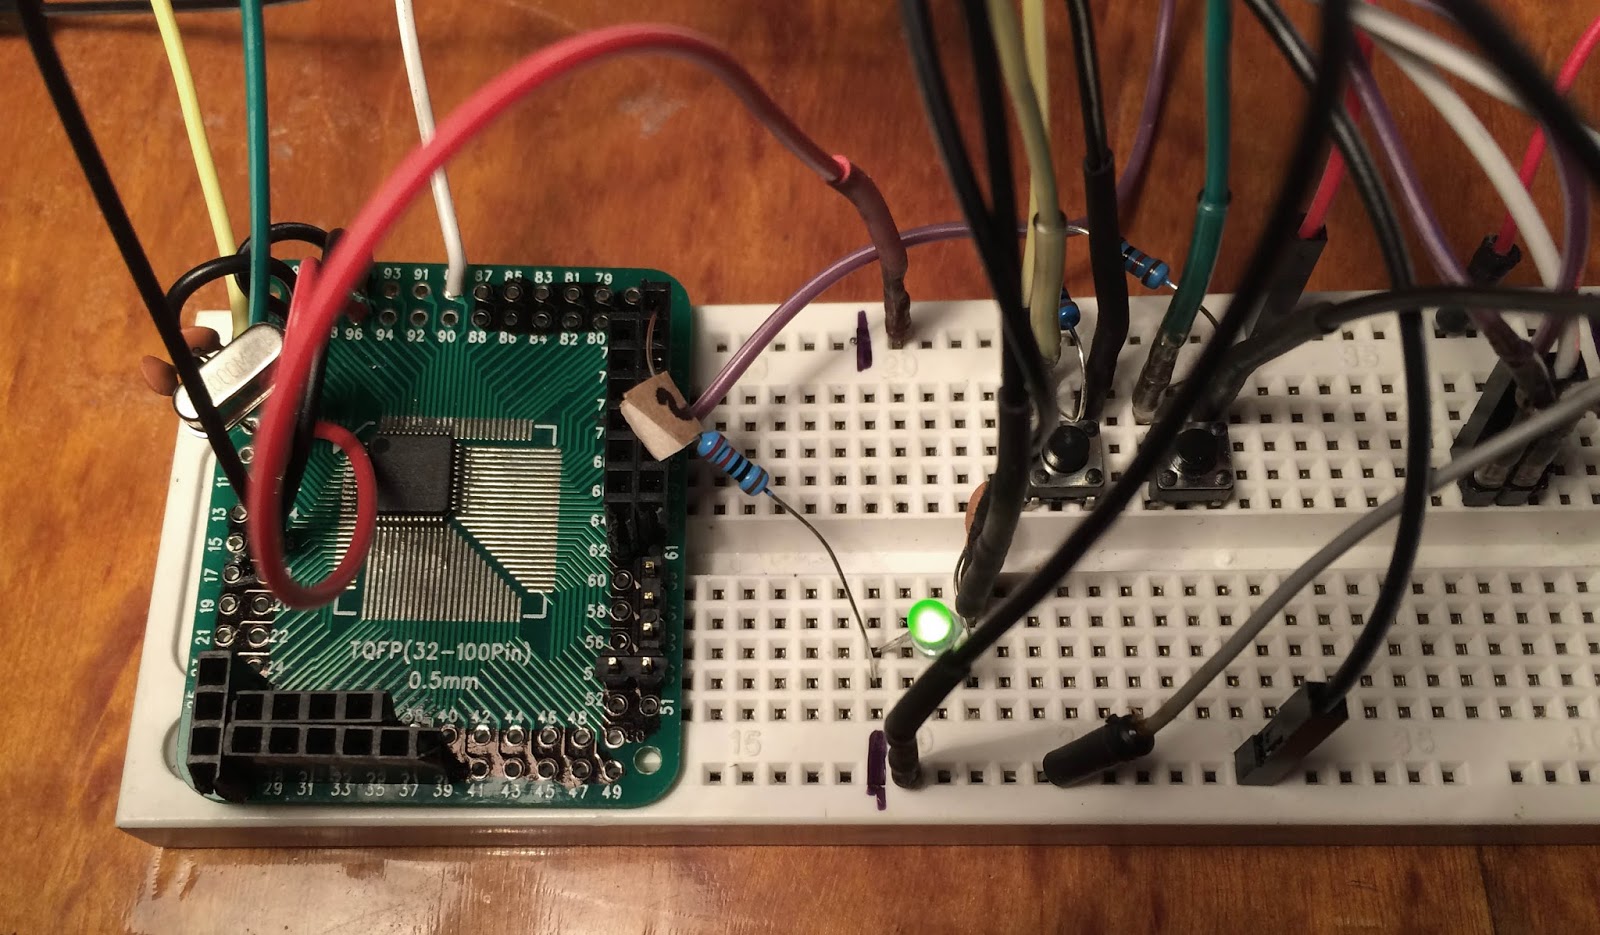
New toy: LPC11U68 (Cortex-M0, 256KB of Flash, 36 KB RAM)
This is a very interesting device. Low-power Cortex-M0 but with plenty of program and RAM memory. Unfortunately, I didn't instantly find a dev board that I liked, so I built my own.
Its running but ... external oscillator PLL lock fails. Maybe its just that the oscillator is poorly placed (long legs etc).
On internal RC runs 100% like it should (yes, MBED blinky example works, led is blinking in pin PIO1_13). Unfortunately, that means that USBPLL can't be used (the accuracy of the IRC is not enough = USBPLL lock fails).
Any advice on debugging PLL lock problems and external oscillator considerations are welcome.
Its running but ... external oscillator PLL lock fails. Maybe its just that the oscillator is poorly placed (long legs etc).
On internal RC runs 100% like it should (yes, MBED blinky example works, led is blinking in pin PIO1_13). Unfortunately, that means that USBPLL can't be used (the accuracy of the IRC is not enough = USBPLL lock fails).
Any advice on debugging PLL lock problems and external oscillator considerations are welcome.
Wednesday, 23 September 2015
Tuesday, 4 August 2015
Looking for code examples ? LPC1343 and LPC1347 are not siblings !
Just a little heads up for anyone starting to work with LPC1347.
Although you could *think* by the naming that LPC1347 is similar to LPC1343, looking at LPC1343 code samples is going to be a waste of your time.
LPC1347 is a Cortex-M3 version of the LPC11U24 (Cortex-M0). LPC1347 is NOT a RAM-expanded version of LPC1343.
Microbuilder.eu sums it up in this sentence:
Code examples for LPC1347 are relatively rare. If you are struggling to find good code examples for LPC1347, here's my advice: search for LPC11U24 or LPC11U35 instead. With high probability you will find example code that works with small (or no) changes also on the LPC1347.
For further study of how LPC1343 and LPC1347 differ, take a look at the CMSIS header files:
LPC13xx.h (for LPC1343)
LPC13Uxx.h (for LPC1347)
And also the similarity of LPC1347 to the LPC11Uxx.h ...
LPC11Uxx.h (for LPC11U24 and LPC11U35)
Although you could *think* by the naming that LPC1347 is similar to LPC1343, looking at LPC1343 code samples is going to be a waste of your time.
LPC1347 is a Cortex-M3 version of the LPC11U24 (Cortex-M0). LPC1347 is NOT a RAM-expanded version of LPC1343.
Microbuilder.eu sums it up in this sentence:
The new GPIO block (of LPC1347) is the same one used in the similar ARM Cortex M0-based LPC11U24, which makes it easy to optimize for cost later and switch between the two devices, but it’s also unfortunately a breaking change compared to the 1343. All pins are now based on two GPIO block – PIO0[0..31] and PIO1[0..31] – rather than the previous four GPIO blocks on the LPC1343. This is potentially the biggest change from a SW migration point of view.Why does this matter ?
Code examples for LPC1347 are relatively rare. If you are struggling to find good code examples for LPC1347, here's my advice: search for LPC11U24 or LPC11U35 instead. With high probability you will find example code that works with small (or no) changes also on the LPC1347.
For further study of how LPC1343 and LPC1347 differ, take a look at the CMSIS header files:
LPC13xx.h (for LPC1343)
LPC13Uxx.h (for LPC1347)
And also the similarity of LPC1347 to the LPC11Uxx.h ...
LPC11Uxx.h (for LPC11U24 and LPC11U35)
Thursday, 30 July 2015
Why your binary will not run on LPC1347 - the missing checksum
So, you've compiled your code and now you have a binary. You've dropped that binary into your LPC1347 / EzSBC2 board, and it won't run. In fact, you get the Mass Storage Controller bootloader popping up.
This is because the bootloader that runs from ROM checks to see if a valid user program is present in flash.
The way it does it is as follows (from LPC1315/16/17/45/46/47 User manual):
21.7 Criterion for Valid User CodeIf the aforementioned checksum is not valid, your code won't run. When you compile in EmBlocks, it does not put in that checksum.
The reserved ARM Cortex-M3 exception vector location 7 (offset 0x0000 001C in the vector table) should contain the 2’s complement of the check-sum of table entries 0 through 6. This causes the checksum of the first 8 table entries to be 0. The bootloader code checksums the first 8 locations in sector 0 of the flash. If the result is 0, then execution control is transferred to the user code
An easy fix to the problem is a command line tool called LPCRC that will calculate and correct the checksum in your binary. I found it in the tools/ section of the Microbuilder LPC11U/LPC13U Code Base, which is an excellent resource for programming your LPC1347.
Wednesday, 22 July 2015
Debugging in EmBlocks part 1: LPC1347 core speed and .SVD files
I now have my Jlink up and running and debugging the EzSBC2 in EmBlocks. Since I am a bit suspicious how the mbed library handles things, I wanted to check the core clock speed from the debugger.
However, when I tried to look at the System Registers debug window to verify that my LPC1347 is indeed running at the correct MHz, the window was empty.
What we need is a so-called device description file (.SVD) that describes the internal registers of the MCU to the debugger.
You can get the .SVD for LPC1347 from NXP lpcware site here.
Stick the .svd file path into your Debug->Interfaces settings thus:
After I had put in the .svd and restarted the debugger, I finally got the info I needed:
NOTE: you will see register values only when the debugger is halted !! NOT when the MCU is running.
SYSPLLCTRL says MSEL is 5. Therefore main clock is (MSEL+1)*oscillator (12 MHz) = 72 Mhz.
SYSAHBCLKDIV says DIV is 1, therefore core clock is main / 1.
= System Core Clock is 72 MHz, as intended.
Checking the core speed from System Registers
However, when I tried to look at the System Registers debug window to verify that my LPC1347 is indeed running at the correct MHz, the window was empty.
What we need is a so-called device description file (.SVD) that describes the internal registers of the MCU to the debugger.
You can get the .SVD for LPC1347 from NXP lpcware site here.
Stick the .svd file path into your Debug->Interfaces settings thus:
After I had put in the .svd and restarted the debugger, I finally got the info I needed:
NOTE: you will see register values only when the debugger is halted !! NOT when the MCU is running.
SYSPLLCTRL says MSEL is 5. Therefore main clock is (MSEL+1)*oscillator (12 MHz) = 72 Mhz.
SYSAHBCLKDIV says DIV is 1, therefore core clock is main / 1.
= System Core Clock is 72 MHz, as intended.
Monday, 20 July 2015
Importing your mbed project to EmBlocks
Unpack the .zip file you got by exporting from mbed online compiler (see previous post).
Open up EmBlocks (or EmIDE, depending on what version you are using).
Import the .eix (EmBlocks eXport) file to EmBlocks:
Open up EmBlocks (or EmIDE, depending on what version you are using).
Import the .eix (EmBlocks eXport) file to EmBlocks:
Put in correct settings for your debugger:
And your device settings (under the Settings >> button)
Exporting your mbed project for EzSBC2 to EmBlocks (EmIDE)
Ok. So the first thing to be aware is:
What I mean by this is that if you export the official mbed lib from mbed online compiler, you will get a zip package with .h headers ... but the actual lib is missing ! So you will not be able to compile in EmBlocks (new version known as EmIDE). You need to import mbed-src to your program, and then export it.
After mbed-src is added to your project, and you have tested it builds in your mbed online compiler, you are ready to export, thus:
There is a bug in mbed export for DipCortex M3 & EmBlocks
What I mean by this is that if you export the official mbed lib from mbed online compiler, you will get a zip package with .h headers ... but the actual lib is missing ! So you will not be able to compile in EmBlocks (new version known as EmIDE). You need to import mbed-src to your program, and then export it.
After mbed-src is added to your project, and you have tested it builds in your mbed online compiler, you are ready to export, thus:
Blinking EzSBC2 LED's in mbed online compiler
User Jim Kizos has written the basic blinky for EzSBC2 in the mbed environment.
main.cpp is like thus:
#include "mbed.h"
// EzSBC2 has 2 LEDs P1_15 and P1_16
DigitalOut Led1(P1_15);
DigitalOut Led2(P1_16);
int main()
{
while(1)
{
Led2 = !Led2;
wait_ms(250);
Led1 = !Led1;
wait_ms(250);
}
}
Tricky bit 1:
There is no target "EzSBC2" in the mbed online compiler. We need to target DipCortex-M3. You can use all the mbed examples for DipCortex M3, provided you change the pinout to suit the EzSBC2 !Tricky bit 2:
Remove the precompiled mbed library. Import the mbed-src full source library into your program. This is because there is a bug in the export to offline IDE / EmBlocks script - the library is not included in the package if you export the official pre-built mbed library - i.e. you won't be able to build in EmBlocks with the package you'll get !! When you export the program with the mbed-src, you'll get everything and will be able to build in EmBlocks (the next blog entry will be about this).Friday, 3 July 2015
Thursday, 25 June 2015
Connecting JTAG debugger to EzSBC2
I have one of these:
... and I plan to use it with Keil MDK and the EzSBC2. The EzSBC2 has SWD (single wire debug) interface, so I need to figure out the connection between the 20-pin JTAG and the EzSBC.
Keil has information on their page about connectors. This info is from there.
I also combined the EzSBC2 schematic and a picture of the board.
UPDATE: Checked and works fine. Pull-up / pull-down resistors were not needed. SWO pin is optional.
Keil has information on their page about connectors. This info is from there.
I also combined the EzSBC2 schematic and a picture of the board.
UPDATE: Checked and works fine. Pull-up / pull-down resistors were not needed. SWO pin is optional.
Wednesday, 24 June 2015
The EzSBC2 dev board by EzSBC
After searching for "LPC1347" on ebay, I settled on buying a EzSBC2 board from EzSBC in USA. I did not want to buy the more known/popular LPCXpresso, because there is just something that I don't like about them. The detachable debugging interface and ... blech. Small and simple is better. And cheap.
The EzSBC2 arrived very quickly (a week ?) from ordering and cost me only 18 €. It arrived in a very well packed box, with some quality pin headers. The EzSBC2 is very similar to the DipCortex M3 and apparently, someone else has been using it with mbed also.
Before I bought the EzSBC2 I checked out what kind of forums the manufacturer had. As it turns out, EzSBC company founder (?) Daniel is very helpful and active on the forum. That sealed the deal for me, right away. With new devices, you want to have all the information you can. It can really speed your progress.
Next update will be about actually programming the EzSBC2 using the mbed online compiler
The EzSBC2 arrived very quickly (a week ?) from ordering and cost me only 18 €. It arrived in a very well packed box, with some quality pin headers. The EzSBC2 is very similar to the DipCortex M3 and apparently, someone else has been using it with mbed also.
Before I bought the EzSBC2 I checked out what kind of forums the manufacturer had. As it turns out, EzSBC company founder (?) Daniel is very helpful and active on the forum. That sealed the deal for me, right away. With new devices, you want to have all the information you can. It can really speed your progress.
![]() |
| EzSBC2 - ARM Cortex M3 - LPC1347 - 64kB Flash, 12 kB SRAM |
Next update will be about actually programming the EzSBC2 using the mbed online compiler
Finding an mbed-compatible development board for LPC1347
I started my search for a suitable development board by checking out the platforms on the mbed site. The reason why I started this way was that I have been a little bit involved in the mbed-community. mbed is, in my opinion, the only real alternative to Arduino. Great community, lots of helpful and knowledgeable people in the forums. Although less by sheer volume of users in the ecosystem, the level of sophistication of the on-line compiler and collaboration tools of the mbed ecosystem are way above and beyond the Arduino.
![]() | |
| The mbed has a huge variety of platforms |
Lo and behold, there was just the ticket: the DipCortex M3 by SolderSplashLabs UK. However, the link to the SolderSplashLabs page is dead. Perhaps, so too is the company ?
Having had some previous experience with mbed development, I know you can find a board that is similar, and then adjust the code to suit your board. Off to Ebay, then !
Drag n' drop programming on the LPC1343 and LPC1347
In order for your PC to "see" your Arduino, your Arduino board most probably has whats called a USB to serial converter chip. When you program your Arduino from the Arduino IDE, what actually happens is that the pc speaks with the USB to serial converter,which in turn talks via serial communication with the microcontroller (that's the ATmega). That is, unless you are using Arduino Leonardo or something else with the ATmega32U which also has built in USB. But basically, you make a serial connection from the PC to the device via USB.
LPC1343 and its bigger brother LPC1347 have a different strategy entirely. These chips have a bootloader in ROM that is capable of identifying itself as an USB mass storage device. What this means is that when you plug in your device the bootloader can make the device pop up as a removable drive on your PC. Programming the device is simply a matter of deleting the firmware.bin on the removable drive and copy pasting your own firmware (a .bin file) into the now empty drive.
Do not be alarmed by CRP_DISABLED - it simply means that "Code Read Protection" is turned off in the device. This is normal.
|
Getting started with NXP LPC1347 (ARM Cortex-M3)
After working on AVR ATmegas for a while, I decided to get back to ARM's.
This blog is intended to be a journal of all the things I encounter on the way.

I set my sights on the LPC1347 because it had the right mix of features for me:
This blog is intended to be a journal of all the things I encounter on the way.
Out with ATmega (Arduino), in with ARM
![]() |
| I have nothing against Arduino. This picture depicts my general feeling on the state of my hobby at the moment. |
Playing around with Arduinos and the ATmega328 (32 kB Flash, 2kB RAM) in particular I got frustrated by the need to have a USB to Serial converter in my projects (i.e. the chip that enables you to connect your Arduino to your PC). I also constantly ran out of program space. Going to "bigger" ATmegas was not an option - ATmega2560 is hugely expensive in my opinion and still doesn't have USB built in.
I set my sights on the LPC1347 because it had the right mix of features for me:
- drag n' drop programming (built-in USB bootloader)
- 64 kB of on-chip Flash
- 12 kB of SRAM
- runs at 72 Mhz
- is 32 bits
- can be programmed on the mbed platform
Subscribe to:
Posts (Atom)